Showing posts with label how to. Show all posts

Saturday, May 12, 2018

Free Chowder Hat Crochet Tutorial

ภาษาไทยเลื่อนไปดูด้านล่าง


For this video, I decided to go back to the same way that I used to do which is a tutorial without narration. Due to the length of the video, editing was really hard and my pc keeps freezing many times, so I decide to keep it simple.

I already make 3 Chowder hat from this pattern and every time it looks the same. So there shouldn't have any problems with the pattern ut if you spot any error that may come from a typo, please noticing me, so I can fix it. Thank in advance.

I am so tried right now and really don't know what I should write here, so let's get straight to the tutorial. Hope you guys like it.

Pattern instruction

LIKE, SUBSCRIBE, and SHARE the video to the world. Thanks.


MATERIALS:
4 ply worsted weight yarn, I used local brand named "Eagle"
I used 4mm. or  size E Clover brand crochet hook.

ABBREVIATION
sc - single crochet
dc- double crochet   st - stitch  
* - backward crochet or crochet with your opposite hand.
sl- slip stitch       ch- chain
inc - increase = 2 dc in same stitch
dec = dc2tog = decrease double crochet
tr-treple crochet
FLO = Front loop only
[ ] - repeat instruction in parenthesis for the number of time.

Start with dark purple yarn
Rnd1: 4 ch, 9 dc in the 1st chain, sl :: 9 stitches
Rnd2: 3 ch, [dc in next 2 st, inc] 3 times, sl :: 12 stitches
Rnd3: 3 ch, [dc in next 3 st, inc] 3 times, sl :: 15 stitches
Rnd4: FLO, 3 ch, inc in next 15 st, sl :: 30 stitches
Rnd5 - Rnd6: 3 ch, dc in next 30 st, sl :: 30 stitches
Rnd7: 3 ch, [dc in next st, inc] 15 times, sl :: 45 stitches
Rnd8 - Rnd9: 3 ch, dc in next 45 st, sl :: 45 stitches

Cut the yarn and fasten off and repeat Rnd1 to Rnd9 again to make the second piece. For the second piece, do not fasten the yarn and continued on Rnd 10.

Rnd10: Join both piece together,
3 ch, dc in next st, dc to join both piece together, dc in same st on the next piece, dc in next 43st, dc to join both piece together, dc in same st on the next piece, dc in next 42st, sl :: 90 stitches 

Rnd11: FLO, 3 ch, dec 3 times, [dc in next st, inc] 19 times, dec 4 times, [dc in next st, inc] 18 times, dec, sl :: 119 stitches
Rnd12- Rnd13: 3 ch, dc in next 119 st, sl :: 119 stitches
Rnd14: 3 ch, dec 3 times, dc in next 50 st, dec 6 times, dc in next 45 st, dec 3 times, sl :: 107 stitches

Rnd15: 3 ch, dec 3 times, dc in next 6 st, dec,
dc in next 10 st, dec 3 times,
dc in next 11 st, dec,
dc in next 8 st, dec 5 times,
dc in next 7 st, dec,
dc in next 10 st, dec 3 times,
dc in next 10 st, dec,
dc in next 7 st, dec, sl :: 88 stitches
Rnd16: FLO, 3 ch, [dc in next 2 st, inc] 29 times, dc in next st, sl :: 117 stitches
Cut the yarn and fasten off, then secure the yarn end.
Changing to pale purple yarn.
Start working on back loop of Rnd 15, and count this as second Rnd16
Rnd16- Rnd22: 3 ch, dc in next 117 st, sl :: 117 stitches


From Rnd23 is the process of making ear cover, if you don't want the ear covor, you can finish the hat at the point and fasten off the yarn.
I used safety pin as a marker for indicate ear cover location. You can easily follow the pattern without doing this process. Or adjust the ear cover position according to your ears.

* - backward crochet or crochet with your opposite hand(without flip your work).

Ear cover
Rnd23: 16 sl, 3 ch, dc in next 18 st, flip :: 18 stitches
Rnd24: * 3 ch, dc in next 10 st, dec, dc in next 6 st, flip :: 17 stitches
Rnd25: 3 ch, dec, dc in next 13 st, dec, flip :: 15 stitches
Rnd26: * 3 ch, dc in next 15 st, flip :: 15 stitches
Rnd27:  3 ch, dc in next 15 st, flip :: 15 stitches
Rnd28: * 3 ch, dec, dc in next 11 st, dec, flip :: 13 stitches
Rnd29: 3 ch, dec, dc in next 9 st, dec, flip :: 11 stitches
Rnd30: * 3 ch, dec, dc in next 7 st, dec, flip :: 9 stitches
Rnd31: 3 ch, dec 2 times, dc in next st, dec 2 times, flip :: 5 stitches
Rnd32: * 3 ch, dec, dc in next st, dec, flip :: 3 stitches

Cut the yarn and fasten off.
From the finish point, count 29 st away and start the second ear cover(Repeat Rnd23-Rnd32) from that point.
(If you have the feeling that it not the right position, believe in your instinct and start at the point you feel the most symmetry.)
sl all around the edge.

Eyes
inc, here means 2 sc in the same stitch.
Rnd1: 5 ch, sc in 2nd ch from hook, sc in next 2 st, 3sc in next st, sc in next 2 st, inc in next st, sl :: 10 stitches
Rnd2: 1 ch, inc in next st, sc in next 2 st, inc in next 3 st, sc in next 2 st, inc in the next 2 st :: 16 stitches

Nose
4 ch, [dc on the 1st ch, 3ch, sl on the 1st ch, 3ch] 2 times, dc on the 1st ch, 3ch, sl on the 1st ch.

Tip of the hat (ปลายหมวก)
5ch, [2tr in to 1st ch, 4ch, sl at 1st ch, 4ch] 2 times, 2tr in to 1st ch, 4ch, sl at 1st ch 

Fasten off

Sewing every piece into place. Optional, you can use 3 colors yarn(Chowder theme color) to make a braid on the ear cover.


แพทเทิร์นภาษาไทย
**หากถักขายกรุณาให้เครดิตโดยการใส่ลิงค์กลับมาที่แพทเทิร์นนี้ด้วย
หมวกชาวเดอร์
1.) โซ่4, 9F ลงโซ่แรก, c - 9
2.) โซ่3, 2FV*3, c -12
3.) โซ่3, 2FV*3, c - 15
4.) เกี่ยวเฉพาะเส้นหน้า โซ่3, 15V, c - 30
5-6.) โซ่3, 30F, c - 30
7.) โซ่3, FV*15, c - 45
8-9.) โซ่3, 45F, c - 45
ปลดไหม ถักซ้ำอีกอัน อันที่สองไม่ต้องปลดไหม ถักต่อเลย
10.) โซ่3, F, Fเชื่อมชิ้นงาน, Fลงจุดเชื่อม, 43F,  Fเชื่อมชิ้นงาน, Fลงจุดเชื่อม, 42F, c - 90
11.) เกี่ยวเฉพาะเส้นหน้า โซ่3, 3A, (FV)*19, 4A, (FV)*18, A, c - 119
12-13.) โซ่3, 119F, c - 119
14.) โซ่3, 3A, 50F, 6A, 45F, 3A, c - 107
15.) โซ่3, 3A, 6F, A,
10F, 3A,
11FA,
8F, 5A,
7FA,
10F, 3A, 10F, A, 7F, A, c - 88

16.) เกี่ยวเฉพาะเส้นหน้า โซ่3, (2FV)*27, F, c - 117

ต่อไหมสีม่วงอ่อนที่เส้นหลังของแถว15 แล้วถักFลงทุกหลัก นับแถวนี้เป็นแถว16ที่2
16-22.) โซ่3, 117F, c - 117
23.) 16c, โซ่3, 18F, พลิก - 18
24.) *โซ่3, 10FA, 6F พลิก - 17
25.) โซ่3, A, 13F, A, พลิก - 15
26.) *โซ่3, 15F, พลิก - 15
27.) โซ่3, 15F, พลิก - 15
28.) *โซ่3, A, 11F, A, พลิก - 13
29.) โซ่3, A, 9F, A, พลิก - 11
30.) *โซ่3, A, 7F, A, พลิก - 9
31.) โซ่3, 2A, F, 2A, พลิก - 5
32.) *โซ่3, A, F, A, พลิก - 3

จากจุดปลดไหมนับมา 29 หัก หรือ ถึงตำแหน่งที่ต้องการ แล้วทำแถว 23-32ซ้ำอีกครั้งเพื่อทำที่ปิดหูอีกข้าง
c เก็บขอบรอบให้เรียบร้อย
ตา (Eyes)
1.) โซ่5, x ลงหลัก2จากปลายเข็ม, 2x, 3xลงหลักเดียกัน, 2x, v, c - 10
2.) โซ่1, v, 2x, 3v, 2x, 2v, c - 16
ปลดไหม

จมูก(Nose)
โซ่4, [ F ลงโซ่แรก, โซ่ 3, cลงโซ่แรก, โซ่ 3,]2ครั้ง, Fลงโซ่แรก, โซ่ 3, cลงโซ่แรก,
ปลดไหม

Tip of the hat (ปลายหมวก)
โซ่5, [2tr ลงโซ่แรก,โซ่4,cโซ่แรก,โซ่4]2ครั้ง,2tr ลงโซ่แรก,โซ่4,cโซ่แรก


******SELLING THE DOLL YOU MADE******

*/*/* Helping translate from English to other languages here: http://www.youtube.com/timedtext_cs_panel?tab=2&c=UCO6B-ObiFoh3cOemJQfoSJA
** If you submit the subtitle, please message me through any social media.
--------------------------------
FOLLOW ME ON 
--------------------------------
SUPPORT this channel through:
Paypal Donation: There's a donate button on the left side of this blog.

Or purchase my paid pattern at 

Thursday, February 23, 2017

Gudetama Lazy Egg Free Crochet Pattern

Gedetama or lazy egg is a cute character from Sanrio. If you ever see some plushies or squishy that have this sleepy face on yellow background, it probably Gudetama. He has many postures to begin with, but I chose the basic sitting posture for this pattern. I am also considerate of making more gudetama in different postures in the future since he is really fast to make and have the same expression on his face.


This pattern is really fast and easy to make. The pattern was written in crochet standard American term.

MATERIALS:
4 ply worsted weight yarn, I used local brand named "Eagle"
3.5mm. hook, I used 6/0 Japanese tulip hook.

ABBREVIATION
sc- single crochet
dc - double crochet
sl- slip stitch
ch- chain
st - stitch
[ ] - repeat instruction in parenthesis
inc - increase = 2 sc in same stitch
sc2tog - decrease single crochet
BLO - Back loop only

Pattern Instruction


Body
Rnd1: 2 ch, 6 sc in the 1st chain, sl :: 6 stitches
Rnd2: 1 ch, inc in next 6 st, sl :: 12 stitches
Rnd3: 1 ch, [sc in next st, inc] 6 times, sl :: 18 stitches
Rnd4: 1 ch, [sc in next 2 st, inc] 6 times, sl :: 24 stitches
Rnd5-Rnd9: 1 ch, sc in next 24 st, sl :: 24 stitches
Rnd10: 1 ch, [sc in next 7 st, inc] 3 times, sl :: 27 stitches
Rnd11: 1 ch, sc in next 27 st, sl :: 27 stitches
Rnd12: 1 ch, [sc in next 8 st, inc] 3 times, sl :: 30 stitches
Rnd13: 1 ch, sc in next 30 st, sl :: 30 stitches
Rnd14: 1 ch, [sc in next 3 st, sc2tog] 6 times, sl :: 24 stitches
Rnd15: 1 ch, [sc in next 2 st, sc2tog] 6 times, sl :: 18 stitches
Rnd16: 1 ch, [sc in next st, sc2tog] 6 times, sl :: 12 stitches
Rnd17: 1 ch, [sc2tog] 6 times, sl :: 6 stitches
Fasten off, length of yarn for sewing and sew hole closed. And sewing for create butt cheek.

Arms
Rnd1: 3 ch, sc on 2nd from hook, 3sc in next st, inc, sl :: 6 stitches
Rnd2: 1 ch, sc in next 6 st, sl :: 6 stitches
Fasten off, and leave some length of yarn for sewing

Legs
Rnd1: 4 ch, sc on 2nd from hook, sc in next st, 3sc in next st, sc in next st, inc, sl :: 8 stitches
Rnd2: 1 ch, sc in next 8 st, sl :: 8 stitches
Rnd3: 1 ch, [sc2tog] 4 times, sl :: 4 stitches
Fasten off, and leave some length of yarn for sewing

Eggwhite  You can
Crochet 2 strand of yarn together with the same hook.
Rnd1: 2 ch, 6 sc in the 1st chain, sl :: 6 stitches
Rnd2: 1 ch, inc in next 6 st, sl :: 12 stitches
Rnd3: 1 ch, [sc in next st, inc] 6 times, sl :: 18 stitches
Rnd4: 1 ch, [sc in next 2 st, inc] 6 times, sl :: 24 stitches
Rnd5: 1 ch, [sc in next 3 st, inc] 6 times, sl :: 30 stitches
Rnd6: 1 ch, [sc in next 4 st, inc] 6 times, sl :: 36 stitches
***Rnd7 is kind of a free hand crochet since egg white is liquid so you can just crochet into the shape that you want. Or simply follow this pattern too.
Rnd7: 1 ch, sc in next st, hdc in next st, 2 dc in next st, hdc in next st, sc in next st, sl in next 3 st,
1 ch, sc in next st, inc,  hdc in next st, 2 dc in next st, hdc in next st, 2 hdc in next st, sc in next 2 st, sl, 1 ch, inc, sc in next st, sl in next 2 st,  1 ch, inc, hdc in next 2 st, 2 dc in next 2 st, hdc in next st, 2 hdc in next st, sc in next 2 st, sl in next st, 1 ch, hdc then dc in next st, hdc then hdc in next st, sc in next st, sl in next st
Fasten off, and leave some length of yarn for sewing

Then secure white yarn. Cut off 1 strand, and use another strand to embroidery his mouth.
Using thick embroidery thread, embroidery chain stitch to create mouth line. Black yarn for embroidery eyes.


That's it! If you have any question or trouble during crochet him, comment here or under the tutorial video, I will answer with the best I can. See you next post.

****Want to sell the finish doll? See private policy here: https://amigurumipianosound.blogspot.co.uk/p/pattern-poly.html

--------------------------------
FOLLOW ME ON
Youtube : https://www.youtube.com/channel/UCO6B-ObiFoh3cOemJQfoSJA
FACEBOOK: https://www.facebook.com/pianosound
Instagram: https://www.instagram.com/amigurumipianosound/
BLOGGER : https://amigurumipianosound.blogspot.com/
--------------------------------
SUPPORT this channel through:
Patreon :https://www.patreon.com/AmigurumiPianosound

Or purchase my paid pattern at
Craftsy : https://www.craftsy.com/user/2234916/pattern-store
ETSY: https://www.etsy.com/shop/Pianosound
RAVELRY : http://www.ravelry.com/patterns/sources/noramon-drons-ravelry-store/patterns

/////For anyone who willing to helping translate pattern from English to other language here:

Saturday, June 18, 2016

DOTA 2 - Phoenix Octo crochet pattern


I know the game called "DOTA", but I never once try to play this game. Not because of it's a bad game or anythings, I just afraid that I will be addicted, lol. I am a type of person that easily addicted to games so I always avoid playing game that need to take time for playing. When my brother hand me a sketch of some little chick(in my point of view) and request for a key chain of this character, so I decide to made it and why not sharing it.


[VIDEO TUTORIAL]


Pattern instruction

Body
Rnd1: 2 ch,6 sc in the 1st chain, sl :: 6 stitches
Rnd2: 1 ch, [2 sc in next stitch] 6 times, sl :: 12 stitches
Rnd3: 1 ch, [sc in next stitch, 2 sc in next stitch] 6 times, sl :: 18 stitches
Rnd4: 1 ch, [sc in next 2 stitch, 2 sc in next stitch] 6 times, sl :: 24 stitches
Rnd5: 1 ch, [sc in next 3 stitch, 2 sc in next stitch] 6 times, sl :: 30 stitches
Rnd6: 1 ch, [sc in next 4 stitch, 2 sc in next stitch] 6 times, sl :: 36 stitches
Rnd7 - Rnd12: 1 ch, sc in next 36 stitch, sl :: 36 stitches
Rnd13: 1 ch, [sc in next 4 stitch, sc2tog] 6 times, sl :: 30 stitches
Rnd14: 1 ch, [sc in next 3 stitch, sc2tog] 6 times, sl :: 24 stitches
Rnd15: 1 ch, [sc in next 2 stitch, sc2tog] 6 times, sl :: 18 stitches
Rnd16: 1 ch, [sc in next stitch, sc2tog] 6 times, sl :: 12 stitches
Rnd17: 1 ch, [sc2tog] 6 times, sl :: 6 stitches
Rnd18: 1 ch, sc2tog until the hole close.
Fasten off

Yellow wing
Rnd1: 4 ch, 3dc in 1st stitch, turn :: 3 stitches
Rnd2: 3 ch, 2dc in next stitch, dc in next stitch, 2dc in next stitch, turn :: 5 stitches
Rnd3: 3 ch, 2dc in next stitch, dc in next 3 stitch, 2dc in next stitch, turn  :: 7 stitches
Rnd4: 3 ch, 2dc in next stitch, skip 1 stitch, sc in the next stitch, 3 ch, 2dc in next stitch, sc in the next stitch, 3 ch, 2dc in next stitch, sc in the next stitch
Fastern off.


Orange wing
Rnd1: 4 ch, 3dc in 1st stitch, turn :: 3 stitches
Rnd2: 3 ch, 2dc in next stitch, dc in next stitch, 2dc in next stitch, turn :: 5 stitches
Rnd3: 3 ch, 2dc in next stitch,sl in the next stitch, 3 ch, 2 dc on sl, sl in the next stitch, 3 ch, 2dc on sl, sl in the next stitch.
Fastern off.


Red-orange wing
Rnd1: 4 ch, 3dc in 1st stitch, turn :: 3 stitches
Rnd2:  3 ch, 2dc in next stitch,sc in the next stitch, 3 ch, 2dc on previous sc, sc in the next stitch
Fastern off.


Mouth
Rnd1: 2 ch, 4 sc in the 1st chain, sl :: 4 stitches
Rnd2: 1 ch, [sc in next stitch, 2 sc in next stitch] 2 times, sl  :: 6 stitches
Rnd3: 1 ch, [sc in next stitch, 2 sc in next stitch] 3 times, sl :: 9 stitches
Fastern off.

Feet
Rnd1: 2 ch, 6 sc in the 1st chain, sl :: 6 stitches
Rnd2: 1 ch, [2 sc in next stitch, sc in next stitch] 3 times, sl  :: 9 stitches
Rnd3: 1 ch, sc in next 9 stitch, sl :: 9 stitches
Rnd4: 1 ch, [sc in next stitch, sc2tog] 3 times, sl :: 6 stitches
Fastern off.

Yellow Tail have two sides
Rnd1: 4 ch, 6 dc in 1st stitch, turn :: 6 stitches
Rnd2: 3 ch, dc in next 6 stitch, turn ::  6 stitches
For first side.
Rnd3: 3 ch, dc in next 3 stitch, turn :: 3 stitches
Rnd4: 3 ch, dc3tog, 1 ch, sl along the tail's side for neat look.
Fasten off.
For second side, join yarn to star crochet on the middle of Rnd2 and repeat Rnd3& Rnd4 again.
Rnd3: 3 ch, dc in next 3 stitch, turn :: 3 stitches
Rnd4: 3 ch, dc3tog, 1 ch, sl along the tail's side for neat look
Fasten off.


Orange tail
Rnd1: 4 ch, 6 dc in 1st stitch, turn :: 6 stitches
Rnd2: 3 ch, dc in next 3 stitch, turn :: 3 stitches
Rnd3: 3 ch, dc3tog, 1 ch, sl along the tail's side for neat look.
Fasten off.
For second side, join yarn to star crochet on the middle of Rnd1 and repeat Rnd2& Rnd3 again.
Rnd2: 3 ch, dc in next 3 stitch, turn :: 3 stitches
Rnd3: 3 ch, dc3tog, 1 ch, sl along the tail's side for neat look.


Red-orange tail
Rnd1: 4 ch, 6 dc in 1st stitch, turn :: 6 stitches
Rnd2: 3 ch, dc3tog, 3 ch, sl on the same stitch, 3 ch, dc3tog, 3 ch, sl ::  stitches
Fasten off.

Crown
Rnd1: 2 ch, 2 sc in the 1st chain, turn :: 2 stitches
Rnd2: 1 ch, 2 sc in next 2 stitch, turn :: 4 stitches
Rnd3: 1 ch, 2 sc in next 2 stitch, sc in next 2 stitch, 2 sc in next stitch,turn :: 6 stitches
Rnd4: 1 ch, sc in next 6 stitch, 6 ch, sl on 2nd stitch from hook, sl on next 2 chain, sl on next 2 chain, and fasten off.
Then join the yarn at the 1st stitch of Rnd4, 6 ch, sl on 2nd stitch from hook, sl on next 2 chain
Rnd5: 1 ch, sc in next 10 stitch, sl, turn :: 10 stitches
Rnd6: 1 ch, sc2tog, sc in next 6 stitch, sc2tog, turn :: 8 stitches
First side
Rnd7: 1 ch, sc in next 4 stitch, turn :: 4 stitches
Rnd8: 1 ch, sc in next 4 stitch, turn :: 4 stitches
Rnd9: 1 ch, sc in next stitch, sc2tog, sc in next stitch, turn :: 3 stitches
Rnd10: 1 ch, sc in next 3 stitch, turn :: 3 stitches
Rnd11: 1 ch, sc in next 3 stitch, turn :: 3 stitches
Rnd12: 1 ch, sc in next stitch, sc2tog, turn :: 2 stitches
Rnd13: 1 ch, sc in next 2 stitch, turn :: 2 stitches
Rnd14: 1 ch, sc2tog, turn :: 1 stitches
Rnd15: 1 ch, sc in next 1 stitch, turn :: 1 stitches
Rnd16: 1 ch, sl along the side.
Fasten off.
For second side, join yarn to star crochet on the middle of Rnd6 and work on the following Rnd7to Rnd15.
Rnd7: 1 ch, sc in next 4 stitch, turn :: 4 stitches
Rnd8: 1 ch, sc in next 4 stitch, turn :: 4 stitches
Rnd9: 1 ch, sc in next stitch, sc2tog, sc in next stitch, turn :: 3 stitches
Rnd10: 1 ch, sc in next 3 stitch, turn :: 3 stitches
Rnd11: 1 ch, sc in next 3 stitch, turn :: 3 stitches
Rnd12: 1 ch, sc in next stitch, sc2tog, turn :: 2 stitches
Rnd13: 1 ch, sc in next 2 stitch, turn :: 2 stitches
Rnd14: 1 ch, sc2tog, turn :: 1 stitches
Rnd15: 1 ch, sc in next 1 stitch, 1 ch, sl along the side.


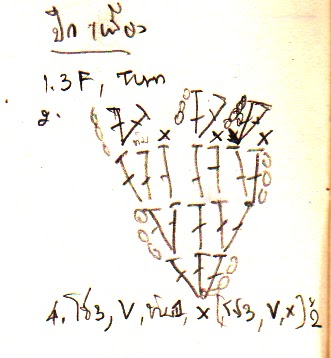
And the picture below is the whole pattern that I note during crochet it. For my Thai friends and some people who prefer xva form pattern, now it's available here: https://amigurumipianosound.blogspot.co.uk/2016/07/dota-2-phoenix-octo-thai-xva-pattern.html


******SELLING THE DOLL YOU MADE******
Visit private policy for more detail: https://amigurumipianosound.blogspot.co.uk/p/pattern-poly.html

*/*/* Helping translate from English to other language here: http://www.youtube.com/timedtext_cs_panel?tab=2&c=UCO6B-ObiFoh3cOemJQfoSJA
--------------------------------
FOLLOW ME ON
Youtube : https://www.youtube.com/channel/UCO6B-ObiFoh3cOemJQfoSJA
FACEBOOK: https://www.facebook.com/pianosound
Instagram: https://www.instagram.com/amigurumipianosound/
BLOGGER : https://amigurumipianosound.blogspot.com/
--------------------------------
SUPPORT this channel through:
Patreon :https://www.patreon.com/AmigurumiPianosound

Or purchase my paid pattern at
Craftsy : https://www.craftsy.com/user/2234916/pattern-store
ETSY: https://www.etsy.com/shop/Pianosound
RAVELRY : http://www.ravelry.com/patterns/sources/noramon-drons-ravelry-store/patterns


Monday, February 29, 2016

Saitama - One punch man amigurumi

Saitama - One punch man amigurumi free pattern

"One punch man" is japanese anime that I recently watch. The theme is so simple one man who can defeat villain with just one punch. I think this anime is more into comedy genre more than action, and it make this anime very enjoyable to watch. From the picture below, I add the quote that Saitama, the main character, our doll, had say in the first episode on the speech bubble. LOL


I was really excite while making this video tutorial. First I have to say that while I was record the tutorial, I don't have this pattern in hand yet. I just recorded and imagined at the same time. So, at some part of tutorial you may find it not continuing. I cutting out the unnecessary part so the video won't be to long.(Even though it end up with 3 parts, lmao)


I used the picture of Saitama Nendoroid as a model. And I just realize that my doll has smaller head than the model. But I think if I make him in the same proportion, he may not be able to stand. I also surprise when he took his first stand, I didn't expect that at all. I just have a feeling like, hmm may be he can stand let's try it, if he cannot just cut this part out of the video. And eventually he can stand!! I don't know how to express my joyful at that time. I hope you guy like the pattern. I write it in standard American terms.


[VIDEO Part 1]

Materials
- Crochet hook size 3 mm. or Japanese size 5/0
- 4ply worst weight yarn color: red, yellow, white, black, beige

ABBREVIATION
ch- chain
sc- single crochet
dc - double crochet  
sl- slip stitch    
sc2tog- decrease single crochet

The doll starting from toe to shoulder, then we crochet separate head and attach them together with separate limps.
Legs
Rnd1: ch4, sc into the 2nd ch from hook, sc in next stitch, 3 sc in next stitch, sc in next stitch, 2 sc in next stitch, sl   :: 8 stitches
Rnd2: 1 ch, 2 sc in next stitch, sc in next stitch, [2 sc in next stitch] 3 times, sc in next stitch, [2 sc in next stitch] 2 times, sl :: 14 stitches
Rnd3: BLO, 1 chsc in next 14 stitch, sl  :: 14 stitches
Rnd4: 1 chsc in next 4 stitch, sc2tog 3 timessc in next 4 stitch, sl ::  11 stitches
Rnd5: 1 chsc in next 2 stitch, sc2togsc in next 3 stitch, sc2togsc in next 2 stitch, sl  :: 9 stitches
Rnd6: 1 chsc in next 9 stitch, sl  :: 9 stitches
Rnd7: 1 ch, [sc in next 2 stitch, 2 sc in next stitch] 3 times, sl :: 12 stitches
Rnd8: 1 ch[sc in next 3 stitch, 2 sc in next stitch] 3 times, sl :: 15 stitches
Change to yellow yarn
Rnd9: 1 ch, sc in next 15 stitch, sl  :: 15 stitches
Rnd10: 1 chsc in next 15 stitch, sl  :: 15 stitches
Rnd11: 1 chsc in next 15 stitch, sl  :: 15 stitches
Rnd12: 1 chsc in next 15 stitch, sl  :: 15 stitches
Rnd13: 1 chsc in next 4 stitch, 2 sc in next stitchsc in next 6 stitch, 2 sc in next stitch, sc in next 3 stitch,sl :: 17 stitches
Rnd14: 1 ch, sc in next 17 stitch, sl  :: 17 stitches
Rnd15: 1 ch, sc in next 17 stitch, sl  :: 17 stitches
FO the first legs, for the second leg do not fasten off and continued Rnd16.

Body
Rnd16: Join two legs together, 1 chsc in next 34 stitch, sl  :: 34 stitches
Rnd17: 1 chsc in next 34 stitch, sl  :: 34 stitches
Rnd18: 1 chsc in next 8 stitch, sc2tog, sc in next 4 stitch, sc2tog, sc in next 10 stitch, sc2tog, sc in next 4 stitch, sc2tog, sl :: 30 stitches
Rnd19: 1 chsc in next 30 stitch, sl  :: 30 stitches
Change to black yarn.
Rnd20: 1 chsc in front post for next 30 stitch, sl:: 30 stitches
Rnd21: 1 chsc in next 30 stitch, sl  :: 30 stitches
Change to yellow yarn
Rnd22: 1 chsc in front post for next 30 stitch, sl:: 30 stitches
Rnd23: 1 chsc in next 11 stitch, sc2tog, sc in next 12 stitch, sc2tog, sc in next 3 stitch, sl :: 28 stitches
Rnd24: 1 chsc in next 28 stitch, sl :: 28 stitches
Rnd25: 1 ch, sc in next 10 stitch, sc2tog, sc in next 13 stitch, sc2tog, sc in next stitch, sl:: 26 stitches
Rnd26: 1 ch, sc in next 4 stitch, sc2tog, sc in next 11 stitch, sc2tog, sc in next 7 stitch, sl :: 24 stitches
Rnd27: 1 chsc in next 24 stitch, sl :: 24 stitches
Rnd28: 1 chsc in next 4 stitch, sc2tog, sc in next 9 stitch, sc2tog, sc in next 7 stitch, sl :: 22 stitches
Rnd29: 1 chsc in next 22 stitch, sl :: 22 stitches
Rnd30: 1 chsc in next 14 stitch, 
White yarn, sc in next stitch, 
Yellow yarn, sc in next 7 stitch, sl :: 22 stitches
Rnd31: 1 chsc2tog, sc in next 3 stitch, sc2tog, sc in next 3 stitch, sc2tog, sc in next 2 stitch, 
White yarn, sc in next stitch, 
Yellow yarn, sc in next 2 stitch, sc2togsc in next 3 stitch, sl :: 18 stitches
Rnd32: 1 ch, sc in next 2 stitch, sc2tog, sc in next 2 stitch, sc2tog, sc in next 3 stitch, 
White yarn, sc in next stitch, 
Yellow yarn, sc2togsc in next 2 stitchsc2tog, sl :: 14 stitches

Rnd33: White yarn, 1 ch, [sc in next stitchsc2tog]* 4 time, sc in next 2 stitchsl :: 10 stitches
Fasten off

Belt's buckle with orange color yarn.
Rnd1: Make an adjustable ring and work 6 sc in the ring, sl :: 6 stitches

Alternative way for belt's bucket, cutting yellow felt sheet into circular shape instead. I don't have color felt in my stock so I cannot do that. 


[VIDEO Part 2 ]

Head
Rnd1: Make an adjustable ring and work 6 sc in the ring, sl :: 6 stitches
Rnd2: 1 ch, [2 sc in next stitch] 6 times, sl :: 12 stitches
Rnd3: 1 ch, [sc in next stitch, 2 sc in next stitch] 6 times, sl :: 18 stitches
Rnd4: 1 ch, [sc in next 2 stitch, 2 sc in next stitch] 6 times, sl :: 24 stitches
Rnd5: 1 ch, [sc in next 3 stitch, 2 sc in next stitch] 6 times, sl :: 30 stitches
Rnd6: 1 ch, [sc in next 4 stitch, 2 sc in next stitch] 6 times, sl :: 36 stitches
Rnd7: 1 ch, [sc in next 5 stitch, 2 sc in next stitch] 6 times, sl :: 42 stitches
Rnd8: 1 chsc in next 42 stitch, sl :: 42 stitches
Rnd9: 1 ch, [sc in next 6 stitch, 2 sc in next stitch] 6 times, sl :: 48 stitches
Rnd10: 1 chsc in next 48 stitch, sl :: 48 stitches
Rnd11: 1 chsc in next 48 stitch, sl :: 48 stitches
Rnd12: 1 chsc in next 48 stitch, sl :: 48 stitches
Rnd13: 1 chsc in next 48 stitch, sl :: 48 stitches
Rnd14: 1 chsc in next 48 stitch, sl :: 48 stitches
Rnd15: 1 ch, [sc in next 6 stitch, sc2tog] 6 times, sl:: 42 stitches
Rnd16: 1 chsc in next 42 stitch, sl :: 42 stitches
Rnd17: 1 chsc in next 42 stitch, sl :: 42 stitches
Rnd18: 1 ch, [sc in next 5 stitch, sc2tog] 6 times, sl:: 36 stitches
Rnd19: 1 chsc in next 36 stitch, sl :: 36 stitches
Rnd20: 1 chsc in next 36 stitch, sl :: 36 stitches
Rnd21: 1 chsc in next 36 stitch, sl :: 36 stitches
Rnd22: 1 ch, [sc in next 4 stitch, sc2tog] 6 times, sl:: 30 stitches
Rnd23: 1 ch, [sc in next 3 stitch, sc2tog] 6 times, sl:: 24 stitches
Rnd24: 1 ch, [sc in next 2 stitch, sc2tog] 6 times, sl:: 18 stitches
Rnd25: 1 ch, [sc in next stitch, sc2tog] 6 times, sl:: 12 stitches
Rnd26: 1 ch, [sc2tog] 6 times, sl:: 6 stitches
Fasten off

Eyes(White)
Rnd1: ch4, sc into the 2nd ch from hook, sc in next stitch, 3 sc in next stitch, sc in next stitch, 2 sc in next stitch, sl  :: 8 stitches
Fasten off

Optional for eyes, instead of crochet them, you can cut some white felt sheet into oval shape and using them to decorate as eyes. This option come with more advantage, you can just use permanent pen to dot his black eyes! Sound easy, right? But beware not to dirty the ink, since it permanent. Also red felt sheet can be cut to triangular shape for his mouth too.

Ears
Rnd1: ch3, 5 hdc into the 1st ch, Fasten off


[VIDEO Part 3]

Arms Start with red yarn.
Rnd1: Make an adjustable ring and work 6 sc in the ring, sl :: 6 stitches
Rnd2: 1 ch, [sc in next 2 stitch, 2 sc in next stitch] 2 times, sl :: 8 stitches
Rnd3: 1 chsc in next 8 stitch, sl :: 8 stitches
Rnd4: 1 chsc in next 7 stitch, bubble, sl ::  stitches
Rnd5: 1 chsc in next 8 stitch, sl :: 8 stitches
Rnd6: 1 chsc in next 8 stitch, sl :: 8 stitches
Rnd7: 1 chsc in next 8 stitch, sl :: 8 stitches
Rnd8: 1 ch, [sc in next 3 stitch, 2 sc in next stitch] 2 times, sl :: 10 stitches
Change to yellow yarn.
Rnd9: Work in front post1 ch, [sc in next 3 stitch, sc2tog] 2 times, sl:: 8 stitches
Rnd10 - Rnd14: 1 chsc in next 8 stitch, sl :: 8 stitches
Rnd15: 1 ch, [sc2tog] 4 times, sl:: 4 stitches
Fasten off

Cape Start with white yarn. 
Rnd1: 25 ch, dc into the 4th ch from hook,  dc in next 21 stitch, turn :: 22 stitches
Rnd2: 3 ch, dc in next 19 stitch, turn :: 19 stitches
Rnd3: 3 ch, dc in next 11 stitchtr in next 8 stitch, turn :: 19 stitches
Rnd4: 4 ch, tr in next 7 stitchdc in next 12 stitch, turn :: 19 stitches
Rnd5: 5 ch, dc into the 4th ch from hook,  dc in next 21 stitch, turn :: 22 stitches
Rnd6: 4 ch, tr in next 11 stitchdc in next 3 stitch, sc in next 2 stitchsl in next 2 stitch
Fasten off
Rnd7: Start at the same reflected side of cape, on Rnd1. sl in next 2 stitch, sc in next 2 stitch, dc in next 3 stitch, tr in next 11 stitch
1 ch, sc along cape's trail.

To be honest I think I didn't do well on the cape job, so you're encourage to modified it to look better! After you are finished crochet every parts sewing them attach together. But if sewing is annoying job for you, and if you are not familiar with sewing you doll may not turn out as you want. Tip is to make sure that they are symmetry for both arms and legs. You can also glue them, if you really hate sewing that much, but be careful not to put too much glue, so it not clearly visible and reduce chance to dirty other part.

That's it. Hope you enjoy the pattern, any problems during making him, comment below or under tutorial video. I will try answer you as fast as I can. If you make doll from this pattern, send me the photo to my facebook


What you want me to crochet next leave the comment below. :)

-If you face any problems during crochet this leave the comments under the video.  
I will answer you as fast as I can. And we can share the solution with others.

Subscribe here: https://www.youtube.com/c/amigurumipianosound

The written pattern is on my blog : http://amigurumipianosound.blogspot.com/
My other Free Crochet Patterns are also on my blog.

******SELLING THE DOLL YOU MADE******
Visit private policy for more detail: https://amigurumipianosound.blogspot.co.uk/p/pattern-poly.html

*/*/* Helping translate from English to other language here: http://www.youtube.com/timedtext_cs_panel?tab=2&c=UCO6B-ObiFoh3cOemJQfoSJA
--------------------------------
FOLLOW ME ON 
Youtube : https://www.youtube.com/channel/UCO6B-ObiFoh3cOemJQfoSJA
FACEBOOK: https://www.facebook.com/pianosound
Instagram: https://www.instagram.com/amigurumipianosound/
BLOGGER : https://amigurumipianosound.blogspot.com/
--------------------------------
SUPPORT this channel through:
Patreon :https://www.patreon.com/AmigurumiPianosound

Or purchase my paid pattern at 
Craftsy : https://www.craftsy.com/user/2234916/pattern-store
ETSY: https://www.etsy.com/shop/Pianosound
RAVELRY : http://www.ravelry.com/patterns/sources/noramon-drons-ravelry-store/patterns